
Table of Content
- Introduction
- What is Medical Device Testing
- Types of Medical Device Testing and Best Practices
- Functional Testing
- Performance Testing
- Safety Testing
- Biocompatibilty Testing
- Usability Testing
- Software Validation and Verification
- Environmental Testing
- Conclusion
Introduction
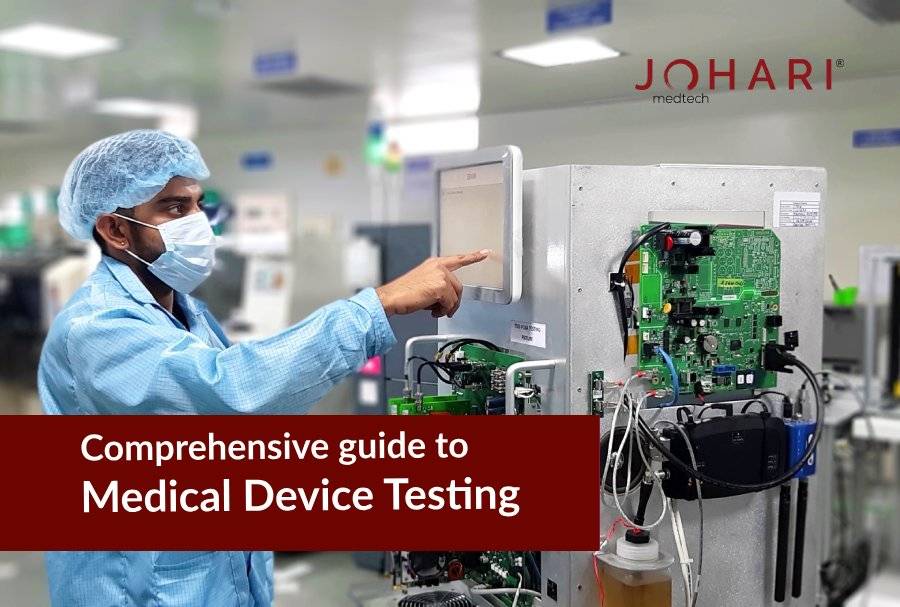
In the fast-paced world of healthcare technology, medical device testing is crucial for ensuring the safety, efficacy, and reliability of electronic medical devices. Medical Device Testing involves multiple steps starting from initial ideation & prototyping until the final Go-To-Market. For electronic medical device contract manufacturing companies, understanding the different types of testing methods is vital to meet regulatory requirements, maintain product quality, and gain customer trust. This article provides a comprehensive overview of various medical device testing types, accompanied by real-world case studies, and highlights best practices for successful implementation.
What is Medical Device Testing?
Medical device testing refers to the process of evaluating the safety, effectiveness, and performance of medical devices. It involves a series of tests, experiments, and evaluations conducted to ensure that medical devices meet regulatory standards and perform as intended. The purpose of medical device testing is to assess various aspects of a device, such as its design, functionality, durability, sterility, biocompatibility, electrical safety, and usability.
Types of Medical Device Testing and Best Practices
#1. Functional Testing
Functional testing is a critical phase in the development of medical devices, ensuring that they perform their intended functions accurately and reliably. This type of testing involves evaluating the device’s functional aspects, including its features, interfaces, and interactions. To illustrate the process of functional testing, let’s explore a case study of a medical device.
Case Study: Functional Testing of an Aesthetic Device for Skin Rejuvenation
Background: A medical device company has developed an aesthetic device that utilizes advanced technology for skin rejuvenation. The device employs a combination of light therapy and radiofrequency energy to stimulate collagen production, reduce wrinkles, and improve skin texture. The company wants to ensure that the device functions effectively and safely for its intended users.
Objective: The objective is to conduct comprehensive functional testing to verify the device’s performance, safety, and adherence to regulatory requirements. The testing aims to identify any functional issues, validate the device’s efficacy, and provide recommendations for enhancement.
Methodology:
- Test Planning: The testing team collaborates with the medical device company to understand the device’s specifications, intended use, and requirements. They develop a detailed test plan outlining the specific functional tests, test scenarios, and success criteria.
- Test Environment Setup: A controlled testing environment is prepared, including the necessary equipment, treatment area models, and simulated skin conditions. This ensures accurate replication of real-world usage scenarios.
- Test Scenarios and Test Cases: Test scenarios and cases are designed to cover various aspects of the device’s functionality and treatment procedures. For example, a scenario might involve testing different energy settings and treatment durations to assess the device’s ability to deliver consistent and effective results.
- Test Execution: The functional testing is conducted by executing the test cases and scenarios in the controlled environment. The testing team operates the device following the manufacturer’s instructions, monitoring the treatment process, and evaluating the device’s performance, including energy delivery, treatment precision, and user interface usability.
- Safety Evaluation: The team assesses the device’s safety features, such as temperature monitoring, skin contact detection, and emergency shut-off mechanisms. They verify that the device operates within safe temperature limits, prevents excessive energy delivery, and ensures user and patient safety.
- Performance Assessment: The team evaluates key performance metrics, including treatment effectiveness, consistency of results, and user experience. They analyze factors such as skin improvement, reduction in wrinkles, evenness of treatment coverage, and user satisfaction.
- Error Handling and Recovery: The device’s error handling and recovery mechanisms are tested to ensure that it responds appropriately to any unforeseen situations or errors during treatment. The team assesses how the device handles interruptions, system failures, and user errors, ensuring it provides clear instructions and recovery options.
- Compliance with Standards: The functional testing is conducted with a focus on ensuring compliance with relevant regulatory standards and guidelines, such as FDA regulations for aesthetic devices or ISO 13485 requirements for medical devices.
- Issue Reporting: Any functional issues, defects, or anomalies encountered during testing are meticulously documented. The testing team logs detailed bug reports, including steps to reproduce the issues, expected behavior, and observed deviations.
- Test Result Analysis: The collected test data and results are analyzed to identify patterns, trends, and areas for improvement. The team compares the device’s performance against the defined success criteria, regulatory requirements, and industry benchmarks.
- Reporting and Recommendations: A comprehensive test report is prepared, summarizing the functional testing process, findings, and recommendations. The report includes a detailed analysis of the device’s performance, highlighting functional strengths and areas for enhancement. The team provides actionable recommendations to address any identified issues and optimize the device’s functionality, safety, and user experience.
#2. Performance Testing
Performance testing of a medical device involves assessing its functionality, reliability, and effectiveness under various conditions to ensure it meets the required performance standards. It aims to identify any performance bottlenecks, limitations, or potential issues that could affect the device’s performance in real-world scenarios. Let’s explore a case study to understand how performance testing can be conducted for a medical device.
Case Study: Performance Testing of an Automated Blood Pressure Monitoring Device
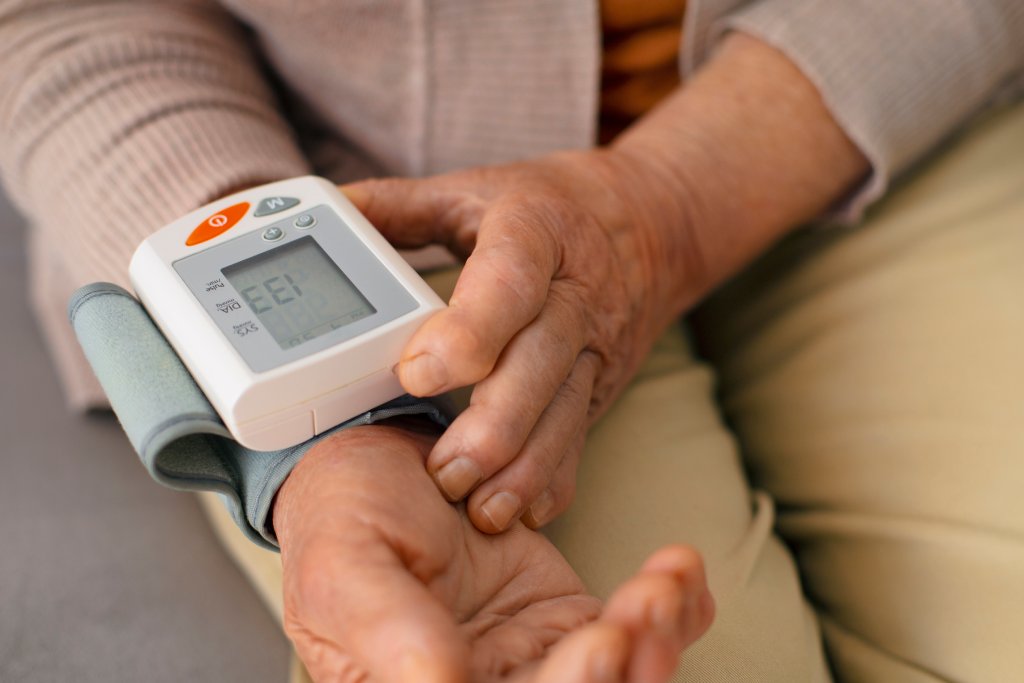
Overview: In this case study, we’ll consider the performance testing of an automated blood pressure monitoring device, which is designed to measure a patient’s blood pressure accurately and provide reliable readings for medical professionals.
- Define Performance Goals: Before initiating the performance testing, it’s essential to establish clear performance goals for the device. These goals can include response time, accuracy, reliability, throughput, and system capacity requirements. For example, the performance goals for the blood pressure monitoring device could be to provide accurate readings within a specified time frame, handle a certain number of concurrent users, and maintain stability over an extended duration.
- Identify Test Scenarios: Next, identify the test scenarios that mimic real-world usage patterns and conditions. For the blood pressure monitoring device, potential test scenarios could include:
- Single User Test: Simulate a single user interacting with the device to measure blood pressure multiple times and assess the response time, accuracy, and stability.
- Multi-User Test: Emulate multiple users simultaneously accessing the device to measure their blood pressure. This test scenario helps evaluate the device’s performance under high load conditions and assess factors such as response time, system capacity, and concurrent user handling.
- Stress Test: Apply a significant load to the device beyond its expected capacity to determine its behavior under extreme conditions. This test helps identify performance bottlenecks, system failures, and the device’s ability to recover gracefully.
- Endurance Test: Continuously use the device for an extended period, typically 24-48 hours, to assess its stability, accuracy, and performance over time. This test helps identify any issues related to long-term usage, such as memory leaks or performance degradation.
- Test Execution and Measurement: Execute the identified test scenarios, capturing relevant performance metrics. Some key metrics for the blood pressure monitoring device could include:
- Response Time: Measure the time taken by the device to provide accurate blood pressure readings upon user interaction.
- Throughput: Assess the number of blood pressure measurements the device can handle per unit of time.
- Accuracy: Compare the device’s readings with standard measurement methods to ensure accurate results.
- Resource Utilization: Monitor the device’s utilization of system resources such as CPU, memory, and network bandwidth to identify any bottlenecks or inefficiencies.
- Error Rate: Measure the rate of errors encountered during the testing process, such as inaccurate readings or system failures.
- Analysis and Optimization: Analyze the collected performance data to identify any performance issues, bottlenecks, or deviations from the established goals. If any issues are discovered, work with the development team to optimize the device’s performance. This could involve code optimization, infrastructure upgrades, or configuration changes.
- Iterative Testing: Repeat the performance testing process after making optimizations to ensure that the device meets the desired performance goals. Conduct regression testing to ensure that the optimizations have not introduced any new issues or regressions.
- Documentation: Document the entire performance testing process, including the test scenarios, test results, performance metrics, and any optimization measures taken. This documentation serves as a reference for future testing and compliance purposes.
By following a systematic performance testing approach as outlined in this case study, the medical device manufacturer can ensure that their automated blood pressure monitoring device performs optimally, meets the necessary performance requirements, and delivers accurate results.
#3. Safety Testing
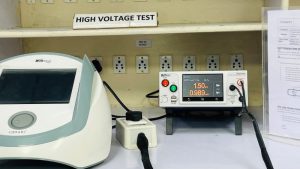
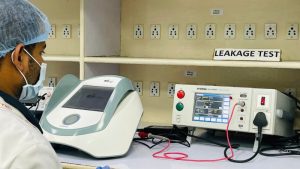
Different regulatory bodies around the globe have an established set of rules and standards to Document functional or equipment testing. The basic requirements for IEC 62353 include:
- Identifying the testing group (outsourced organization, manufacturer, service provider, etc.)
- Person(s), who conducted the testing and evaluation(s)
- Identifying equipment/system (e.g., type, serial number, inventory number) and the accessories tested
- Specific Measurements & data
- Date, type, and results of Manual inspection, Specific Data or values obtained, Final evaluation & Signature document of the individual’s performance.
Safety testing assesses potential risks associated with using medical devices, encompassing electrical, mechanical, thermal safety, and electromagnetic compatibility (EMC) considerations. For example: Safety testing on an Electrotherapy Device, ensuring desired output on a specific frequency, grounding, mechanical stability, and electromagnetic interference protection.
#4. Biocompatibility Testing
Biocompatibility testing is a crucial aspect of ensuring the safety and compatibility of electronic medical devices with the human body. It involves assessing the device’s potential interactions with biological systems and evaluating its biologically safe performance. In this case study, we will examine the biocompatibility testing process for an electronic implantable device, specifically a cardiac pacemaker.
The cardiac pacemaker is designed to regulate and control the heart’s electrical activity in patients with abnormal heart rhythms. As it directly interacts with bodily tissues and fluids, thorough biocompatibility testing is essential to ensure patient safety and device effectiveness.
The biocompatibility testing process involves the following steps:
- Material Selection: The first step is to select materials that are compatible with the human body. Materials used in the pacemaker, such as the casing, leads, and electrodes, must be non-toxic, non-allergenic, and resistant to degradation in the physiological environment.
- Cytotoxicity Testing: The pacemaker components are subjected to cytotoxicity tests to determine whether they cause harm to living cells. These tests involve exposing cell cultures to the materials and evaluating their effects on cell viability and functionality.
- Sensitization Testing: Sensitization tests assess the potential of the pacemaker materials to cause an allergic response in the human body. They involve exposing the materials to skin or mucosal tissues and monitoring for any adverse reactions, such as redness, swelling, or itching.
- Irritation and Intracutaneous Reactivity Testing: These tests evaluate the potential of the pacemaker materials to cause irritation or inflammation when in contact with skin or tissues. The materials are applied to the skin or injected into the tissue, and the resulting reactions are assessed.
- Hemocompatibility Testing: Since the pacemaker interacts with blood, hemocompatibility testing is conducted to evaluate its compatibility with the blood components. The materials are exposed to blood samples, and parameters such as hemolysis (red blood cell damage) and coagulation are measured.
- Systemic Toxicity Testing: Systemic toxicity tests assess the potential of the pacemaker materials to cause adverse effects on the entire organism. These tests involve administering the materials to animal models and observing for any systemic reactions or toxic effects.
#5. Usability Testing
Usability testing plays a critical role in the development of medical devices, ensuring they are user-friendly, safe, and effective for their intended users. It involves evaluating a device’s usability by observing user interactions and gathering feedback in a controlled environment. To illustrate this process, let’s explore a case study of usability testing for a diabetes glucose monitoring system.
Case Study: Usability Testing of a Diabetes Glucose Monitoring System
Background: A medical device company has developed an innovative glucose monitoring system for individuals with diabetes. The system comprises a blood glucose meter, a lancet for blood sampling, and a mobile application for data tracking and analysis. The company aims to assess the device’s usability, accuracy, and alignment with user needs.
Objective: The objective is to conduct usability testing to evaluate the device’s effectiveness, efficiency, and user satisfaction. Additionally, the company seeks to identify usability issues and opportunities for improvement.
Methodology:
- Participant Recruitment: A diverse group of participants representing the target users is recruited. The selection includes individuals with varying types of diabetes, technological proficiency levels, and age groups.
- Test Environment Setup: A usability testing lab is prepared with the necessary equipment and devices. The lab is equipped with cameras, microphones, and eye-tracking technology to record participants’ interactions, facial expressions, and visual focus during the testing.
- Test Scenarios and Tasks: Realistic scenarios and tasks are designed to simulate typical usage situations. For example, a task might involve measuring blood glucose levels, inputting the data into the mobile app, and generating a report. Participants are given a predefined set of tasks to complete while providing verbal feedback, expressing their thoughts, and raising any concerns.
- Data Collection and Observation: The usability test is conducted individually with each participant. The facilitator explains the purpose, obtains informed consent, and records demographic information. Participants are then provided with the device and given instructions to complete the assigned tasks. The facilitator closely observes the interactions, noting difficulties, errors, or areas of confusion. Participants’ feedback, both verbal and non-verbal, is recorded.
- Post-test Questionnaire: After completing the tasks, participants are asked to fill out a questionnaire or participate in a post-test interview. The questionnaire may include standardized usability metrics such as the System Usability Scale (SUS) or the Post-Study System Usability Questionnaire (PSSUQ). These metrics assess usability, learnability, efficiency, and user satisfaction.
- Data Analysis: Collected data, including task performance, observations, and questionnaire responses, are analyzed to identify patterns, issues, and usability concerns. Qualitative feedback is categorized and prioritized based on severity and frequency.
- Reporting and Recommendations: A usability testing report is prepared, summarizing findings, insights, and recommendations for improving device usability. The report highlights specific areas for improvement, such as user interface design, labeling, error prevention, and instructional materials. The development team utilizes this report to guide further iterations and enhancements of the device.
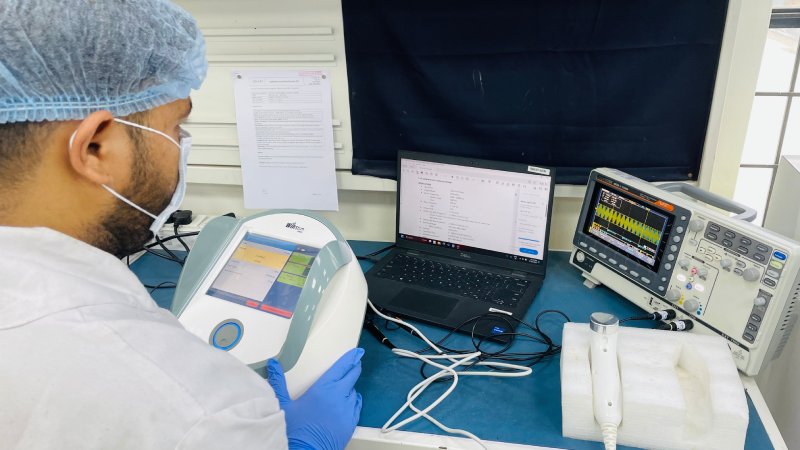
#6. Software Validation and Verification
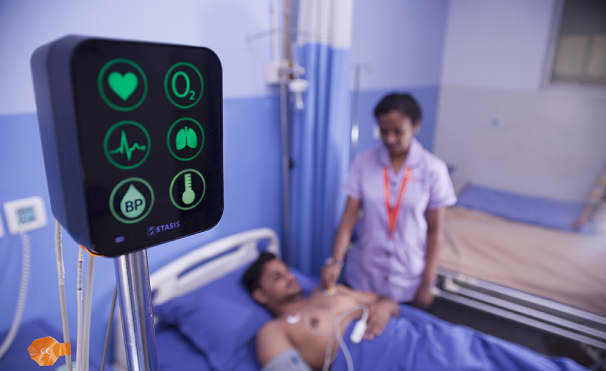
Image source: Stasis Labs
For devices with software components, software validation and verification (V&V) testing ensures adherence to requirements, correct operation, and reliable performance.
Case Study: The patient monitoring system is intended for use in hospitals and healthcare facilities. It continuously monitors vital signs such as heart rate, blood pressure, respiratory rate, and oxygen saturation levels. The software component of the device processes the sensor data, generates real-time visualizations, and triggers alarms for abnormal readings. The accuracy and reliability of the software are vital for timely intervention and patient safety.
#7. Environmental Testing
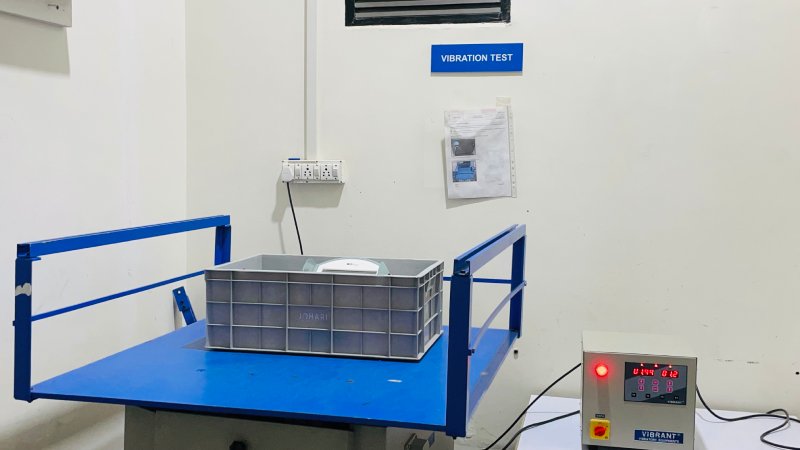
Environmental testing evaluates device performance and reliability under various environmental conditions like temperature, humidity, pressure, vibration, and shock. For example: We test every device, confirming its ability to withstand rugged environments, maintain the intended use, and endure transportation challenges.
Conclusion
Medical device testing is a critical step in developing and manufacturing electronic medical devices. By employing a variety of testing types and methodologies, manufacturers can ensure functionality, performance, safety, and usability. Real-world case studies demonstrate successful implementation of testing practices. By prioritizing comprehensive testing protocols, electronic medical device contract manufacturing companies can adhere to regulations, produce high-quality devices, and build a reputation for reliability and safety. This guide equips companies with knowledge and best practices to excel in the competitive healthcare technology landscape.
To prevent crisis and accelerate successful Go-To-Market without limiting the financial and functional glitches testing at multiple levels is of utmost importance.
Schedule a Meeting with Johari Digital Healthcare Ltd. to accelerate your devices successfully to market with minimal overhead costs and unnecessary time lags.